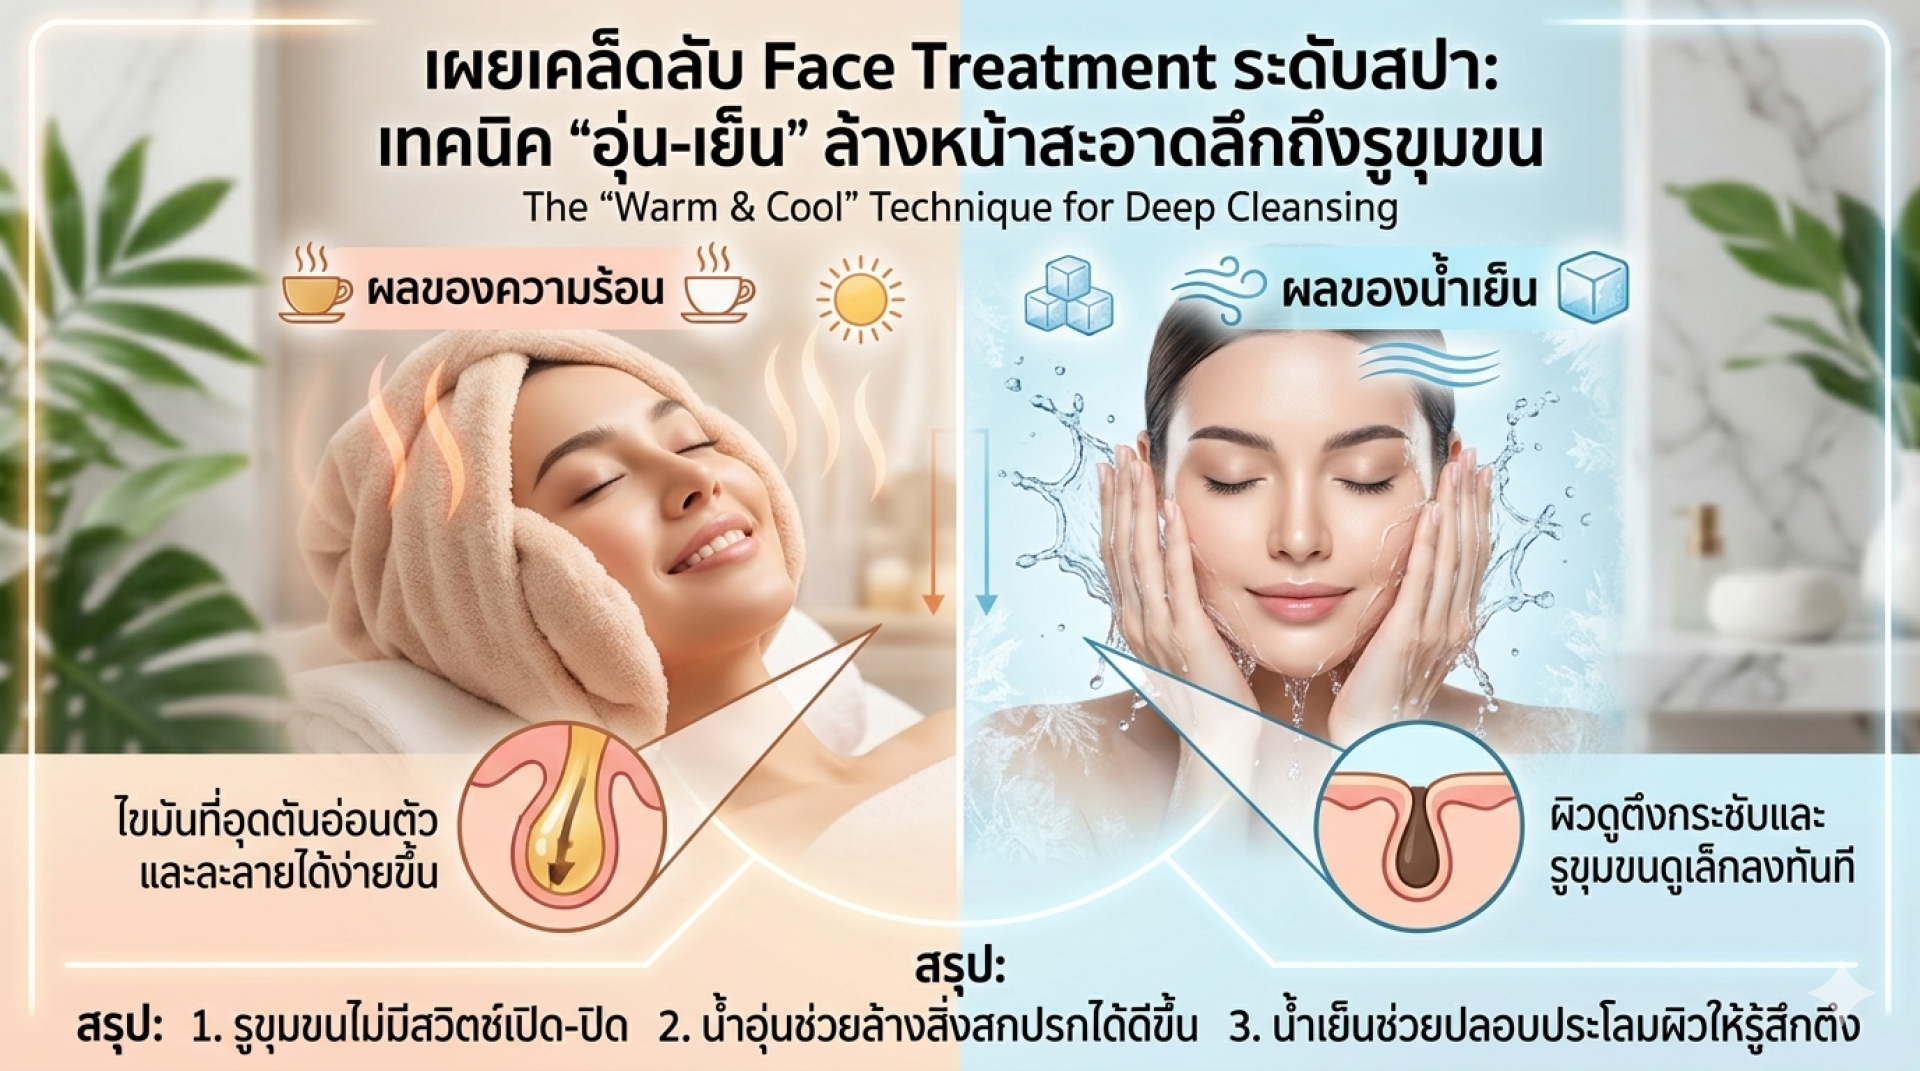
Expert Face Treatment Secrets: The 'Warm & Cool' Technique for Deep Pore Cleansing
How-to: Professional At-Home Face Treatment (4 Steps)
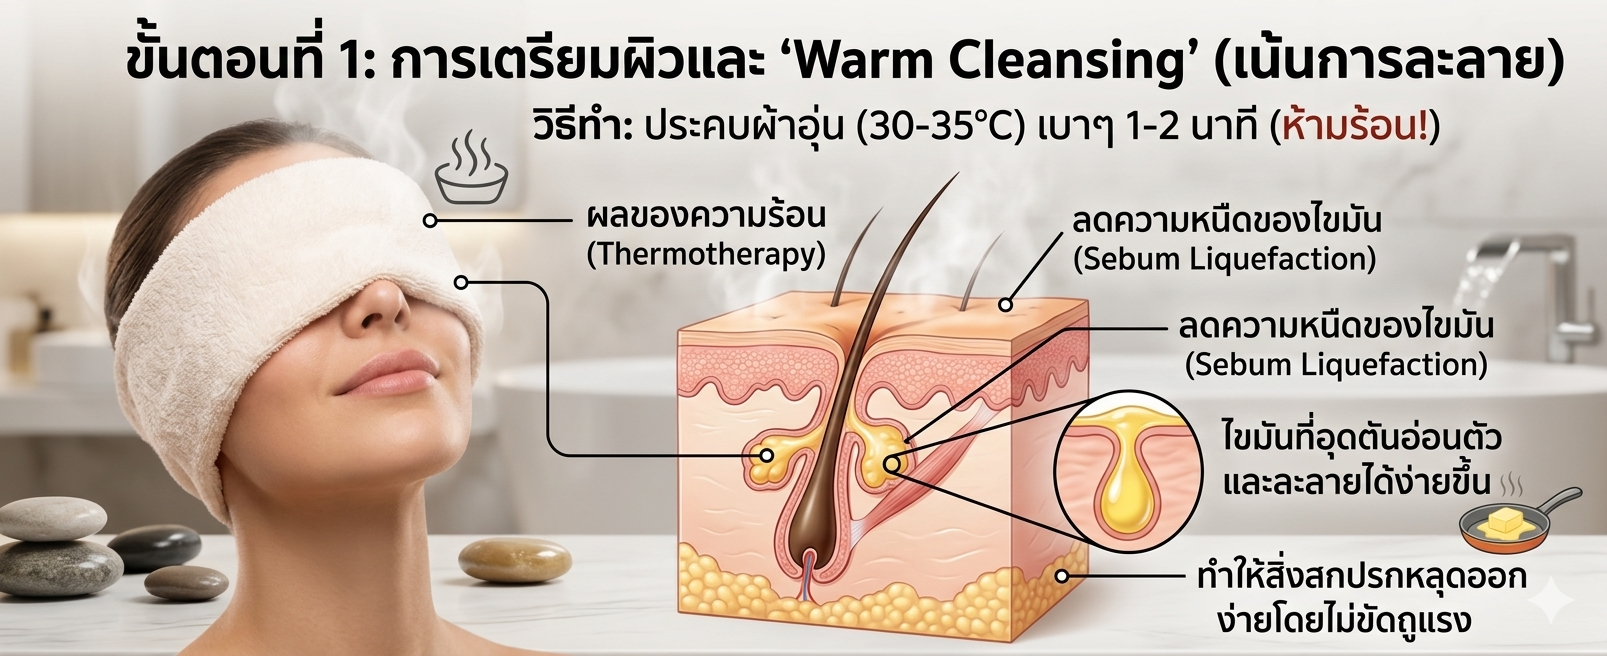
Step 1: Skin Prep & "Warm Cleansing" (Focus: Liquefaction)
How-to: Soak a clean towel in warm water (approx. 30-35°C—it should feel comfortably warm, never hot!). Gently press it against your face for 1-2 minutes.
The Professional Principle: This step is not about "opening pores." Instead, it utilizes Thermotherapy at an optimal temperature to induce Sebum Liquefaction. By reducing the viscosity of hardened oils clogged within the pores—much like melting butter on a pan—your cleanser can more effectively lift away impurities and makeup without the need for harsh scrubbing.
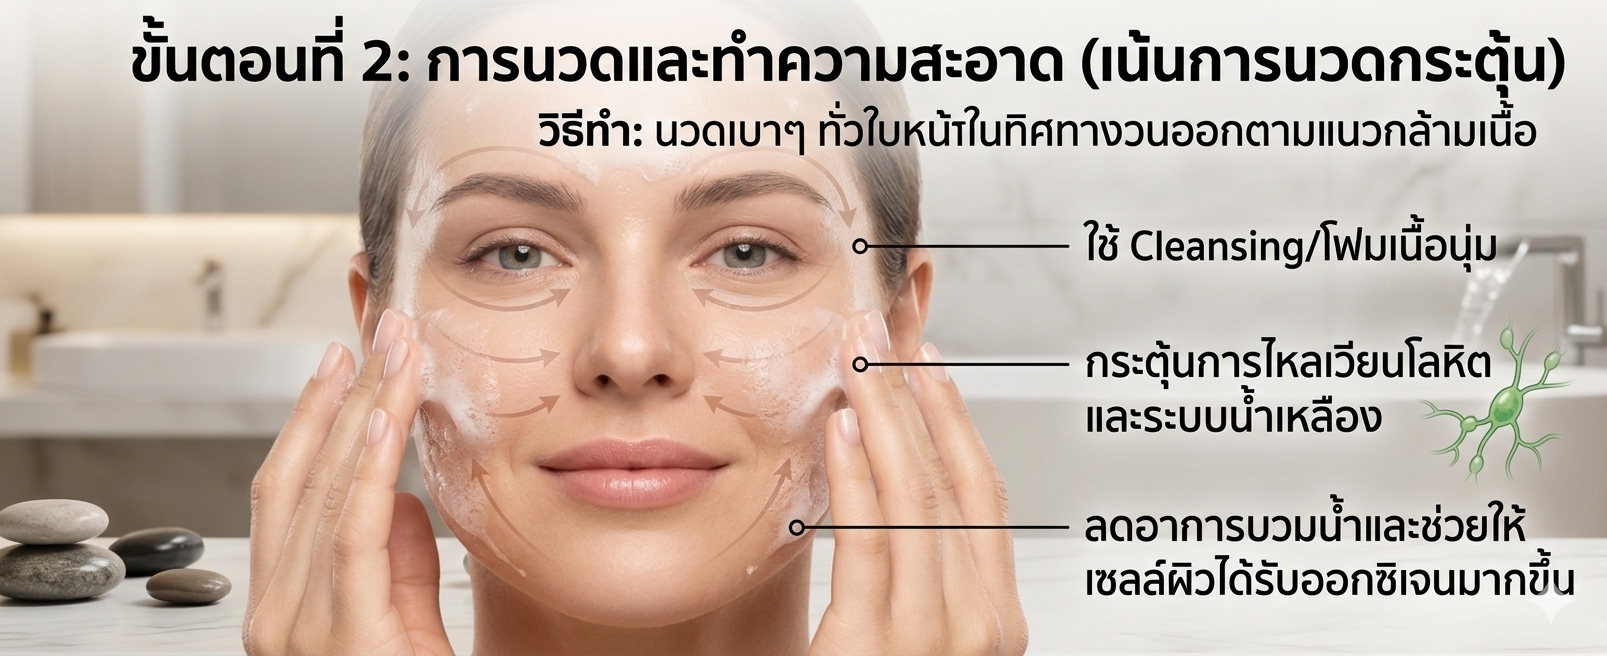
Step 2: Massage & Cleanse (Focus: Stimulating Circulation)
How-to: Apply a gentle cleansing milk or soft foam. Massage gently across the face in outward, circular motions following the natural direction of the facial muscles.
The Professional Principle: Massaging while the skin is slightly warm stimulates Blood Circulation and facilitates Lymphatic Drainage. This process increases oxygen delivery to skin cells, resulting in a more radiant complexion and a visible reduction in puffiness.
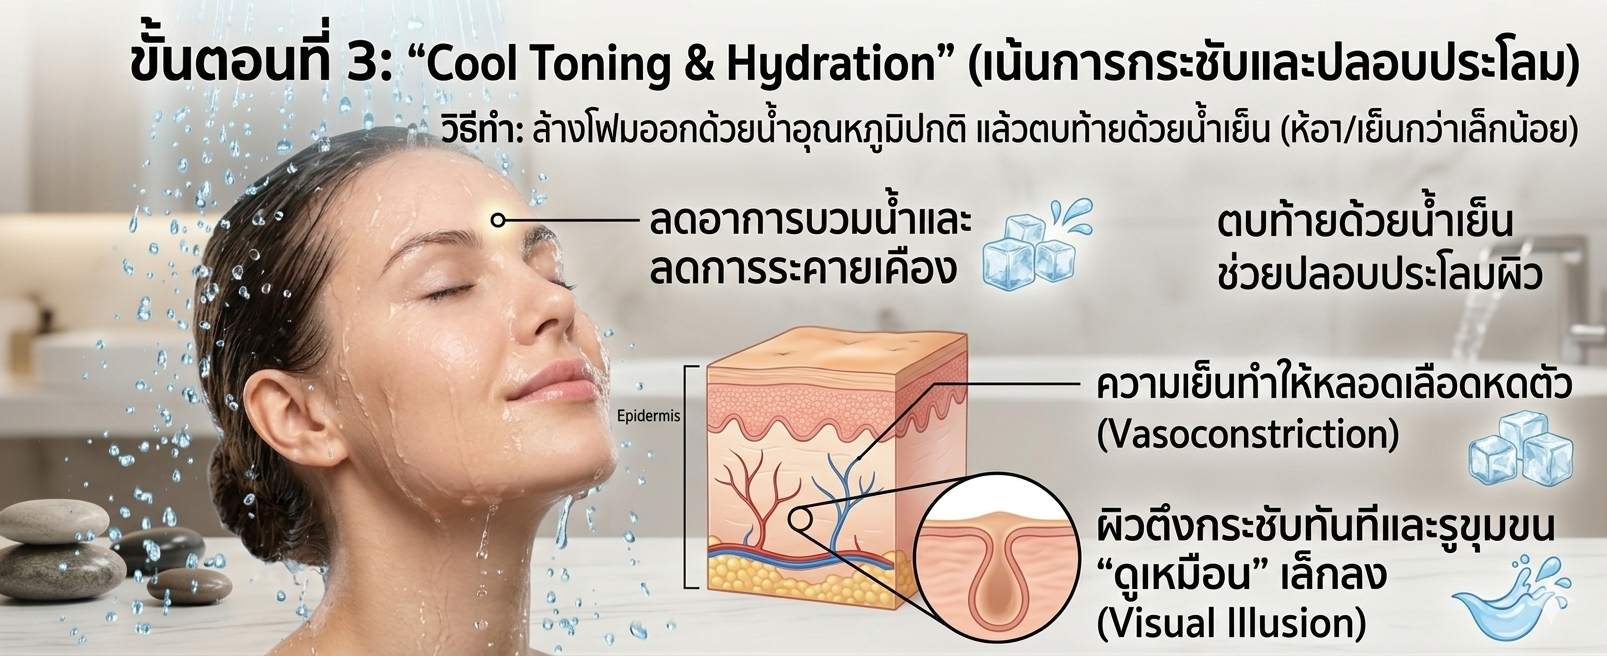
Step 3: "Cool Toning & Hydration" (Focus: Tightening & Soothing)
How-to: Rinse off the cleanser thoroughly with room-temperature water, then finish by splashing your face with cool water (room temperature or slightly cooler) about 5-10 times.
The Professional Principle: The drop in temperature triggers rapid Vasoconstriction (blood vessel contraction), which provides two key benefits:
Temporary Tightening Effect: The skin appears smoother and creates a Visual Illusion of smaller pores as inflammation and puffiness subside.
Nutrient Retention: Splashing with cool water refreshes the skin surface. When followed immediately by a toner or essence, the tightened skin helps "lock in" hydration more effectively, preparing the canvas for maximum absorption.
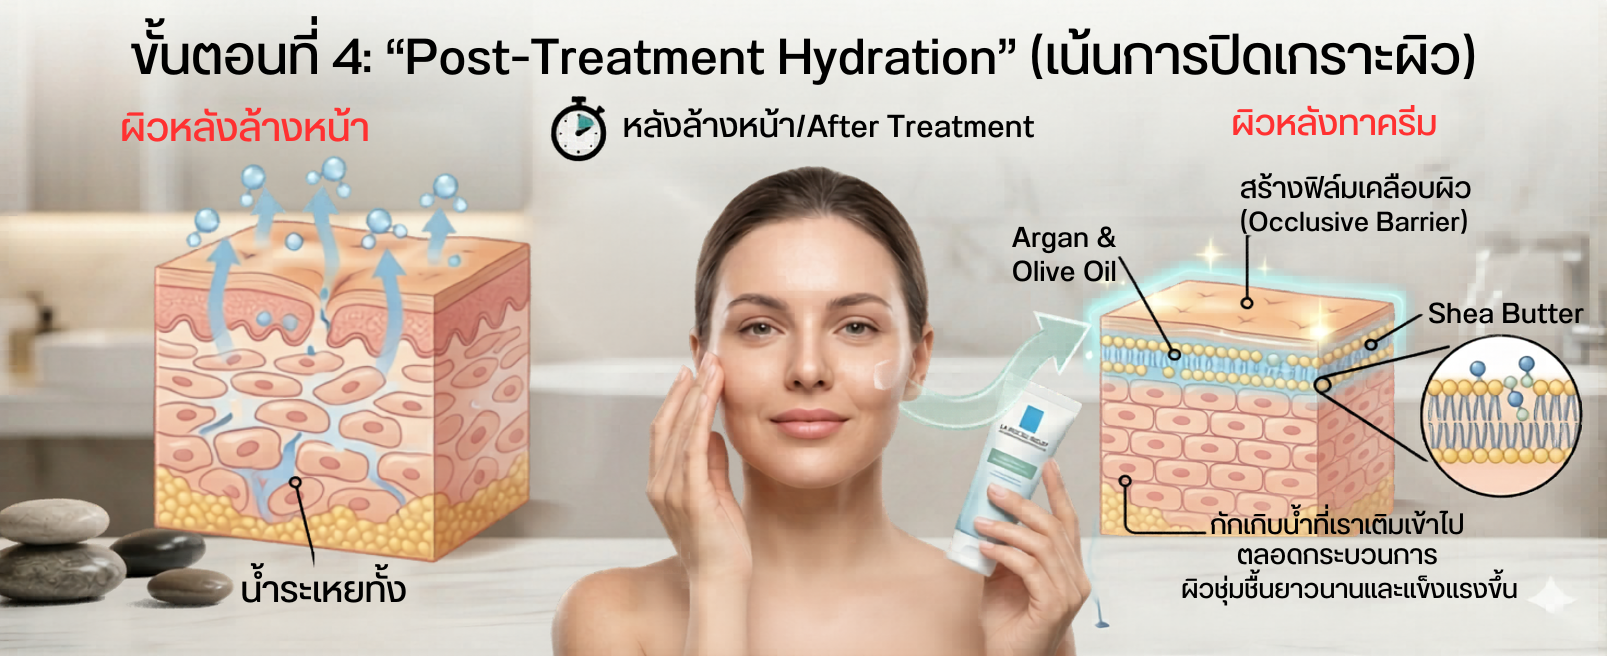
Step 4: "Post-Treatment Hydration" (Focus: Barrier Protection)
How-to: Gently pat your face with a towel until damp (not bone-dry). Immediately apply a moisturizer—ideally one containing Skin Barrier ingredients like Ceramides or Shea Butter.
The Professional Principle: This is the most critical step! The cool rinse primes the skin to receive nourishment. Applying moisturizer immediately creates a thin Occlusive Barrier that seals in the moisture added during the treatment. This effectively minimizes TEWL (Transepidermal Water Loss), ensuring your skin remains hydrated, resilient, and strengthened for the long term.